PUMP-FUN-SWAP CREATOR TOOLS [STARTERS GUIDE]
Minimum System Requirements:
- Windows operating system and a decent PC
- Good internet connection (speed and stability)
- Solana wallet with at least 0.25 SOL
Download latest version: https://cryptobots.dev/scripts/pumpfun-creator-tools-free-download
1) INITIAL SETUP GUIDE
First you need to download latest version .zip file and extract it to any folder – this folder becomes the working directory for the creator tools, meaning it will save all the logs and settings there.

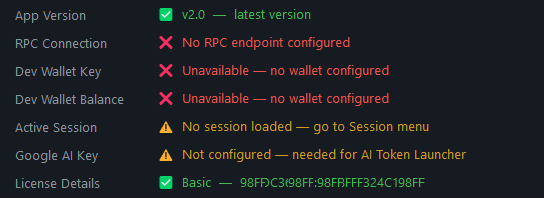
When you first launch the creator tools, it will give all kinds of warnings which is normal – there is initial setup required – you need to set up dev wallet, RPC endpoint and AI key – more details will be explained later in this guide.

To begin, you will need these three things:
- Solana wallet with at least ~0.25 SOL on it
- RPC link (free at https://dashboard.helius.dev)
- Google AI API key (free at https://aistudio.google.com/api-keys)
Once you got them all, you can continue. Mind you, in order to get the free API key from Google, they will ask you to link the credit card to the account but they will never charge anything unless you upgrade your free plan in Google dashboard. So once ready, fill in all the fields in Settings and click SAVE SETTINGS:
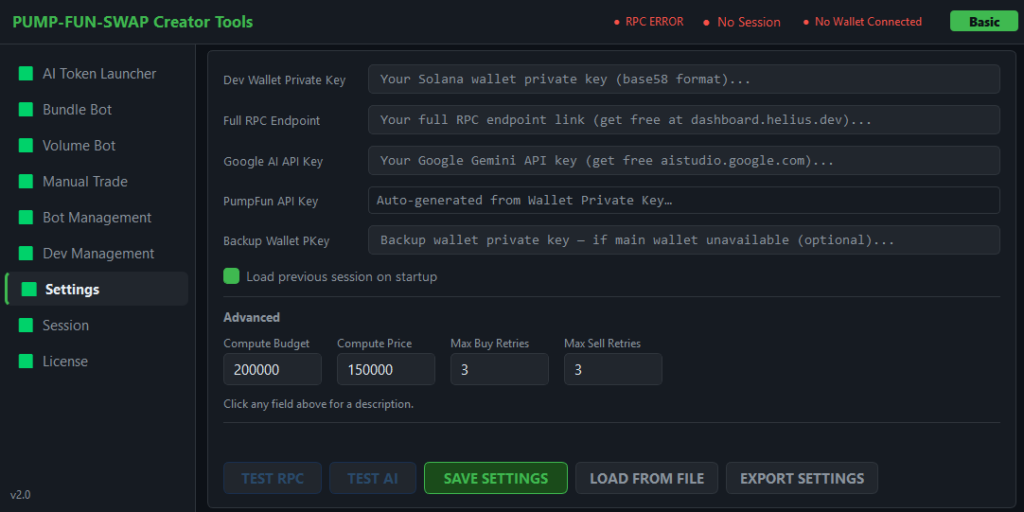
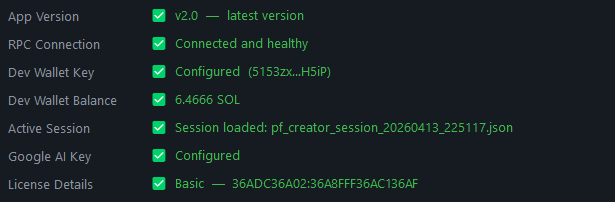
Once all of that is set up correctly (you can also use TEST RPC and TEST AI buttons to verify they work as expected), then your Settings page will look like this:
At this point the creator tools have created your local encrypted configuration file, saved next to the program itself, and some log data such as session and launched tokens database folder:

As you can see below, the contents of settings file are encrypted and can only be read from your PC:

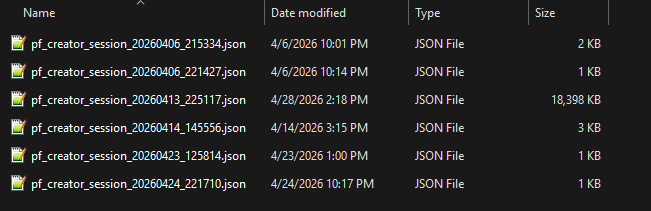
The folder session_logs contains all of the saved sessions, which include details about launched tokens, trade history, bundle and volume bot wallet details (address and private keys) all in plain text for a backup purpose:
This is needed so that when you restart the tool another time it will automatically load the settings for you, so no further setup is needed. Next I will explain al the main menu items and how to use them.
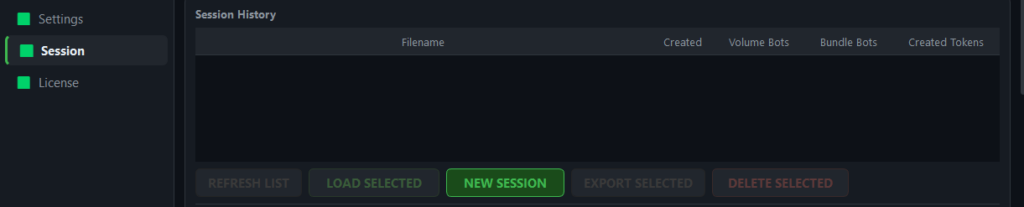
When you launch the app for the very first time, you need to not only create the Settings, but also make a new session file – just go to Session menu and click NEW SESSION button. Then you are ready.
2) AI TOKEN LAUNCHER
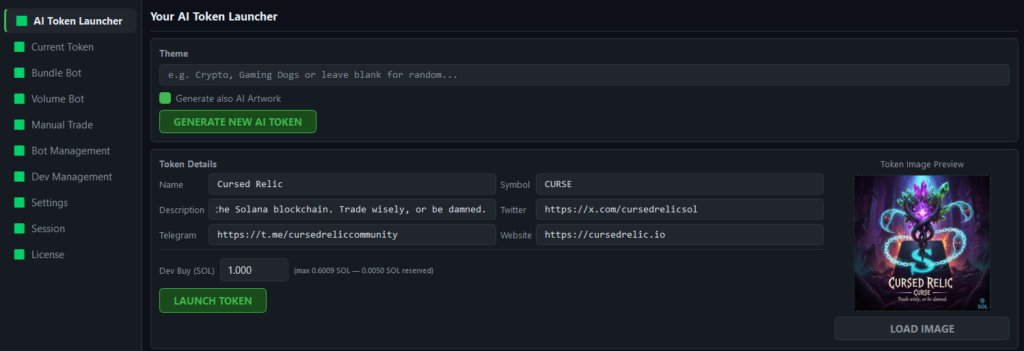
This is the page where you can let AI generate you a professional token along with all its details and even matching artwork. Fill in the custom theme or leave it blank, press the GENERATE NEW AI TOKEN button and in a moment fields below will be filled in. Then edit whatever you wish, type the dev buy amount and press LAUNCH TOKEN:
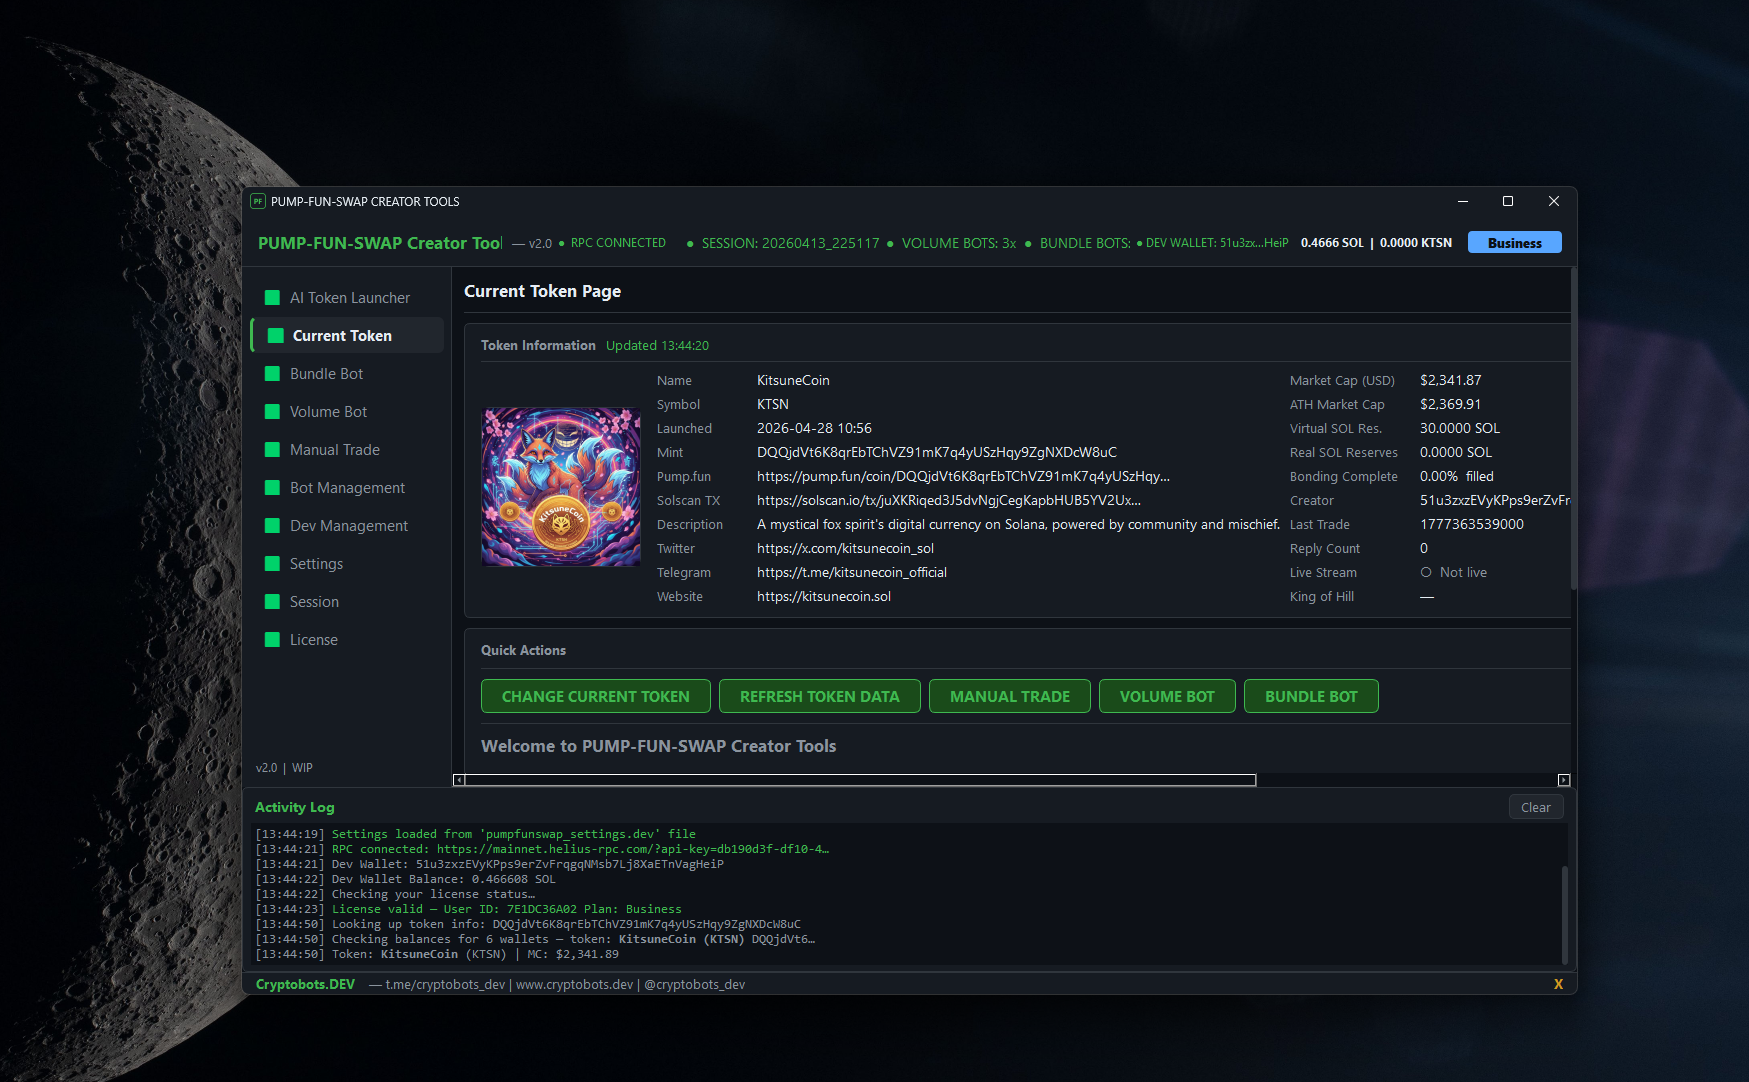
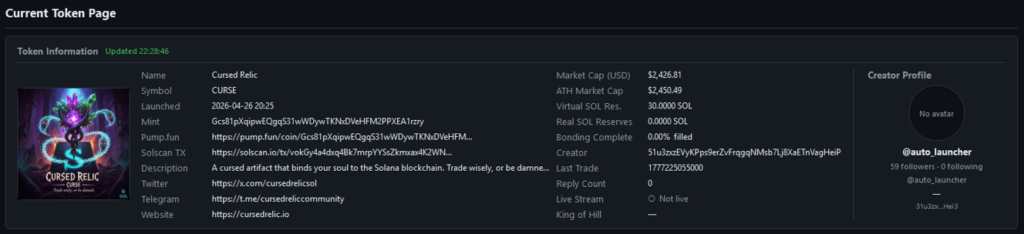
When token launch is completed, this token will be set as Current Token (but you can change it anytime):
The Activity Log always displays status of current operations and gives you feedback if something went wrong, so its always worth to take a look there, regardless of what you are doing in the tool:

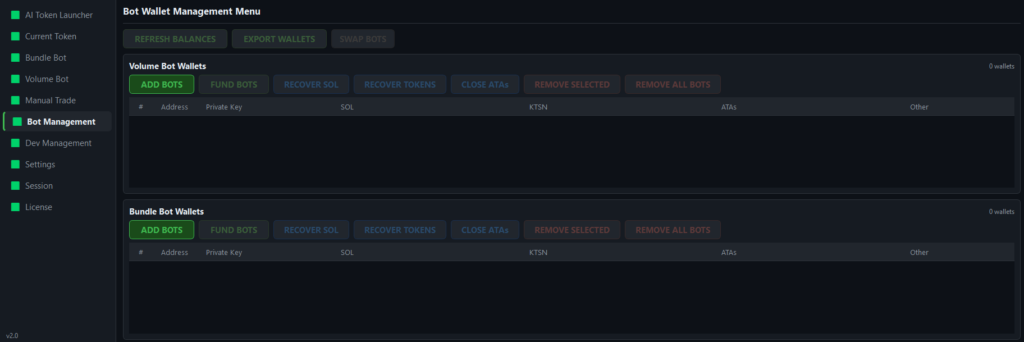
3) BOT MANAGEMENT
In order to use BUNDLE or VOLUME bots, first you need to set them up – go to Bot Management menu page. This page is split in two parts- upper side is Volume bots and the lower are Bundle bots, and there are controls for every bot type, such as FUND BOTS or RECOVER SOL. All of the buttons are self explanatory. So just press ADD BOTS, once they are added do FUND BOTS to send some SOL to them in order to be used in volume or bundle operations. All of the bot wallet details will be stored in session file locally. The Bot Management page also serves as a checkup point to see what all the bots are holding and gives the opportunity to do transfers.
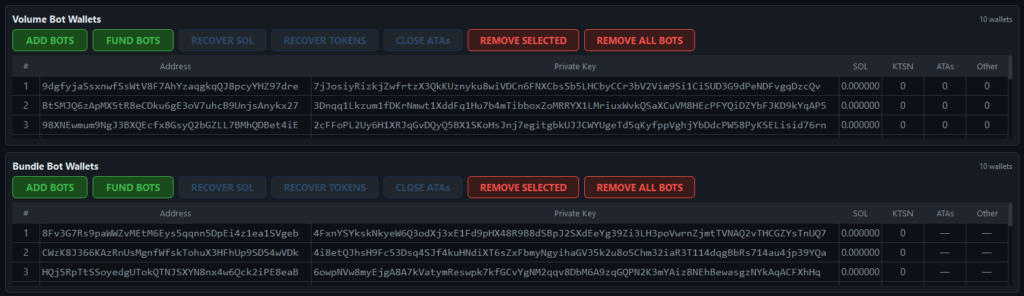
Once you have set up the bots, the page should look something like this with all of the bot management functions available – recover sol (if there is any sol), recover tokens (if there are any tokens), close token accounts (if there are any), same as remove selected or all of current type:
4) BUNDLE BOT MENU
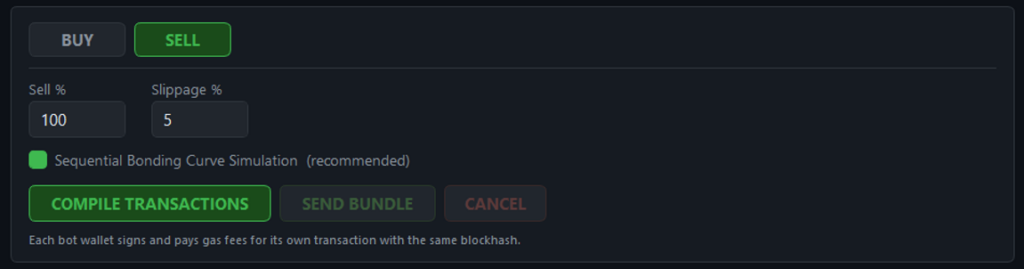
The bundle bot menu itself is very straightforward – select BUY or SELL and fill in the fields below. Then press COMPILE TRANSACTIONS and afterwards SEND BUNDLE to execute trade.
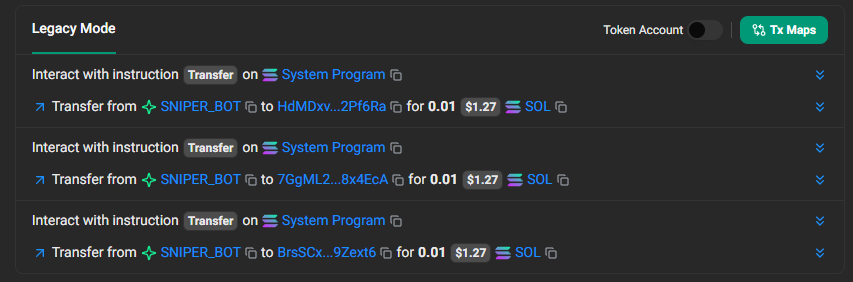
Example of how all of the bundle bots do a BUY trade at once (same goes for SELL):
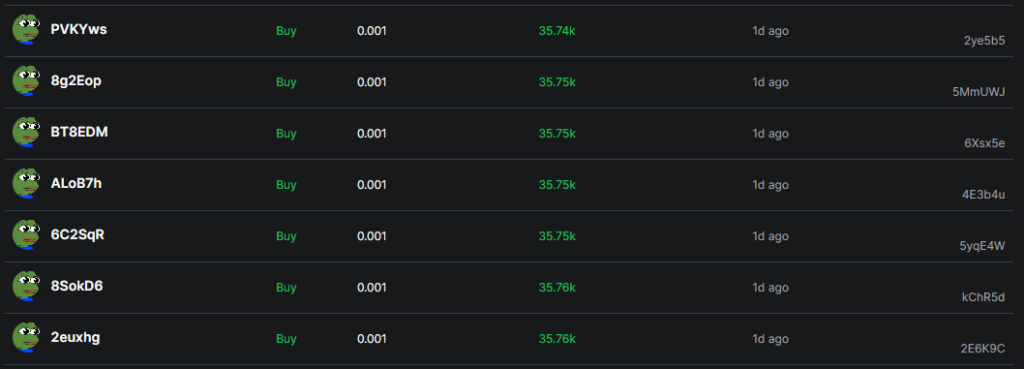
When buying you specify the SOL buy amount, but when selling you enter the selling percentage of holdings. When selling 100% of holdings the tool will also close any token accounts.
5) VOLUME BOT MENU
In the volume menu you got a bit more configuration options to draw the chart and simulate real trading activity. This mode does actual trading on your selected token with previously created and funded volume bots. So first you set the numbers – maximum SOL buying amount for the bot (every time it will pick a random trade amount but not more than max set), maximum bot trade cycles (leave as zero for unlimited), then the max slippage, max sleep time (this is the wait time between every bot trade – also maximum allowed value, bot will pick a random in that range) and the launch delay which controls if all bots are started instantly or one by one with a delay between launches:
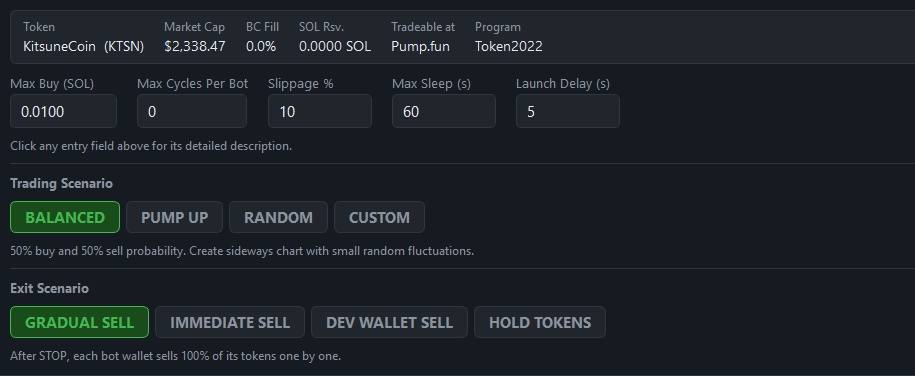
For the Trading Scenario currently there are four options – each one with different buy/sell probabilities, you can even set your own in custom option. This is the probability bot will place the trade type with respect to if it even can afford it – if not, bot tries to sell some of holdings in order to get some funds to continue running. If it runs out of everything, it stops while all other bots keep working.
And for the Exit Scenario you pick event chain what will happen when STOP is pressed. The GRADUAL SELL means every bot will sell 100% of its token holdings one by one, with a few seconds delay between bots. The IMMEDIATE SELL is when all of the volume bots sell at the same time 100% of their holdings, but when using this mode be sure to up the slippage as the last ones to execute might start to fail if slippage is too tight. Then is the DEV WALLET SELL which is the rugpull pretty much – all of the bots send 100% of their holdings to dev wallet and instantly dev wallet sells 100% of everything in a single transaction. Finally the HOLD TOKENS mode does what it says – bots just quit working, all the tokens remains in them – useful for manual management later via Bot Management menu.
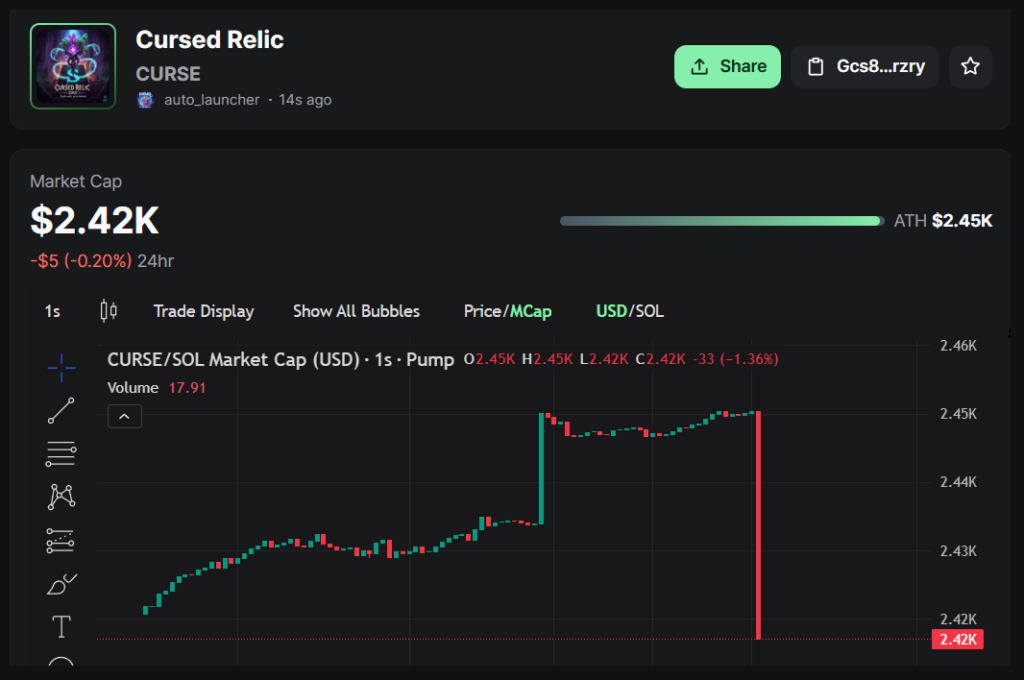
Here is an example of chart drawn 100% with the PUMP-FUN-SWAP CREATOR TOOLS (in addition to some random buyers while running):
6) MANUAL TRADE MENU
The manual trade lets you trade any tokens from dev wallet, very straightforward.

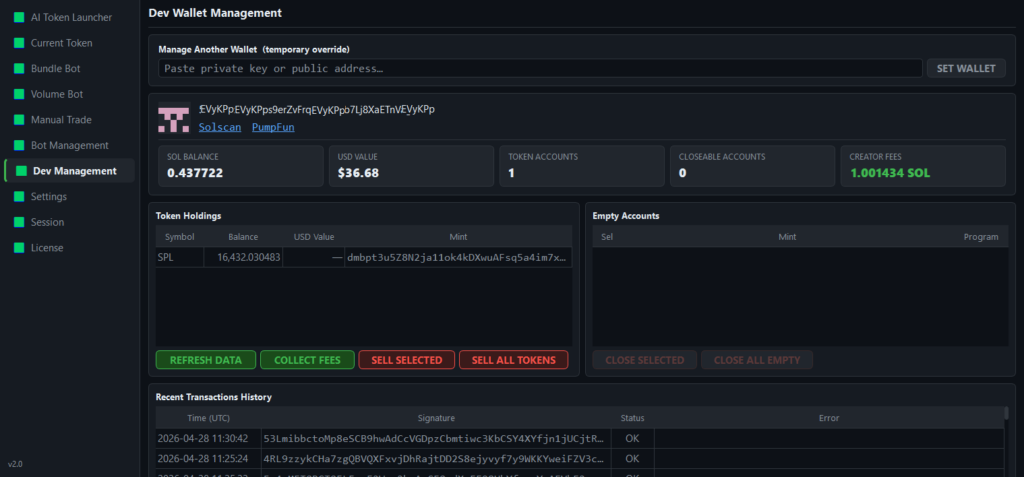
7) DEV MANAGEMENT MENU
This is the place where you can manage the connected dev wallet – see balances, all token holdings, sell anything, close unclosed accounts, see and claim pumpfun creator rewards, as well as see last 50 transactions this wallet did.
Comments, ideas and feedback always welcome! I might use your ideas to make this even better!
/// To contact us on Telegram use the link below: